Configuration and authentication
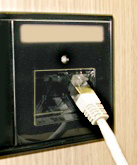
Please always plug the cable into the far right port as shown in the picture!
Configure network settings on your PC
- Press the Windows key and the R key simultaneously.
- Type “services.msc” in the Open input field.
- Then click on “OK”.

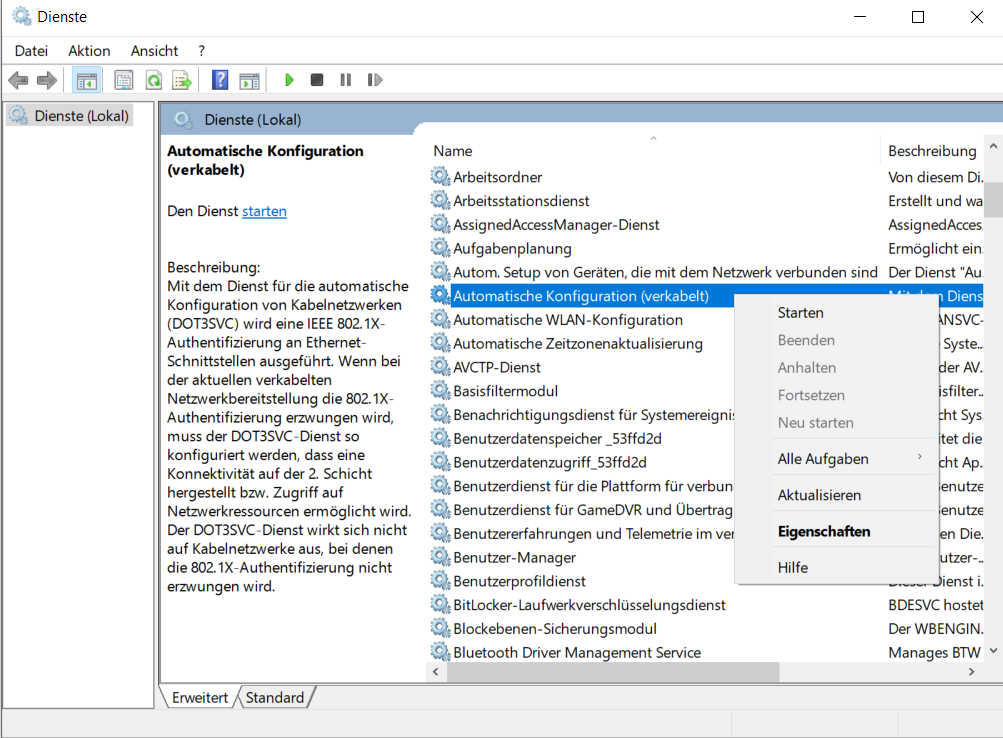
- Select Dienste „Dienste (Lokal)“
- Right-click on „Automatische Konfiguration (verkabelt)“
- Click on “Eigenschaften”
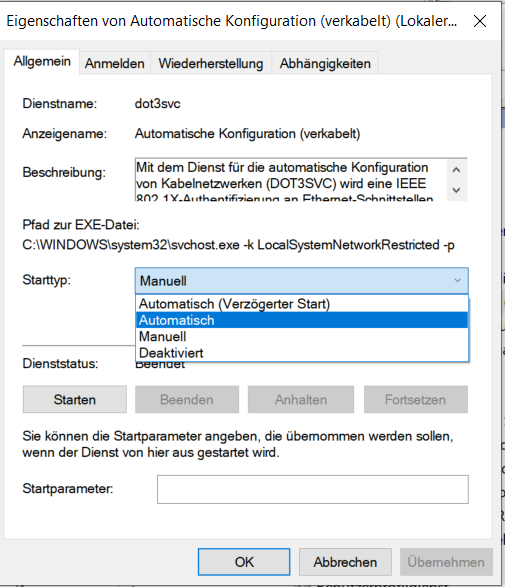
- Select “Automatisch” as the startup type if you want the service to start after every restart. Keep in mind that this may not always be desired – for example, if you also want to use other cable network connections. So the only important thing is that the service has been started, the startup type plays a subordinate role.
- Click on „Starten“.
- Click on “OK”.
- The Services window can be closed.
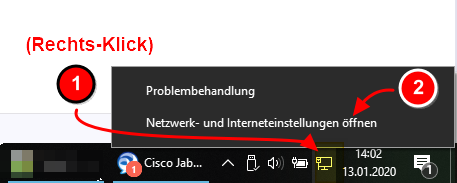
- Right-click on the network connection icon at the bottom of the taskbar, then click “Netzwerk-und Interneteinstellungen öffnen”.
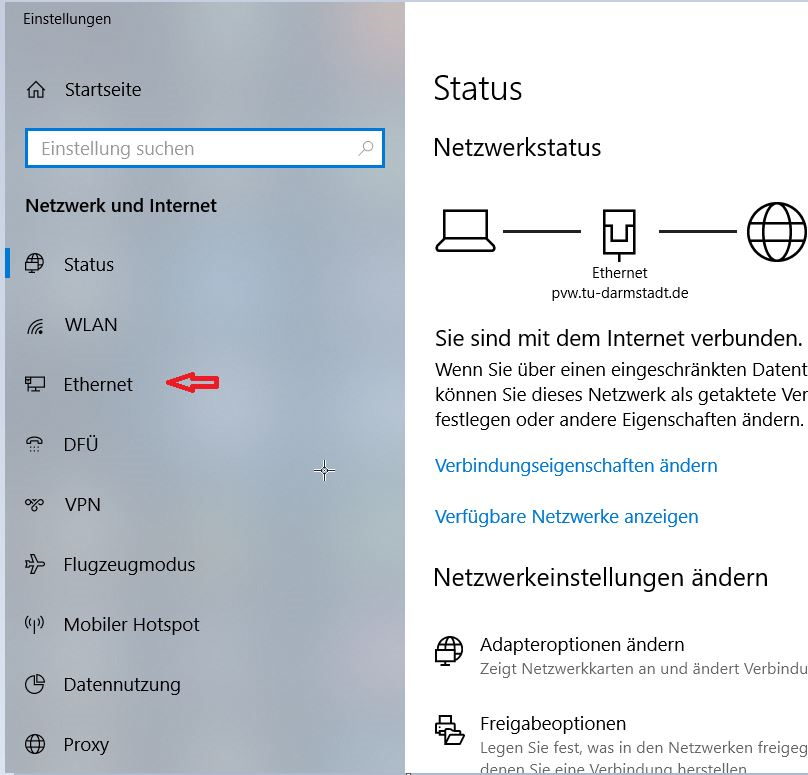
- Click on “Ethernet” in Settings
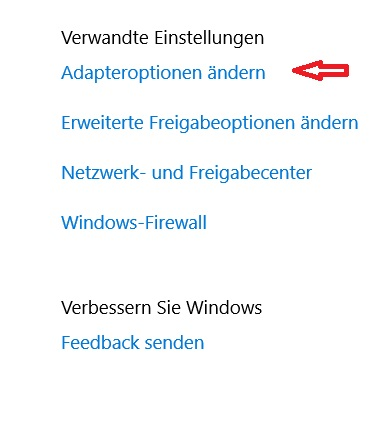
- Under Setting (=Eigenschaften), click “Adapteroptionen ändern”.

- Click with the right mouse button on the network port of your computer, which you want to use (usually Ethernet).
- Click on “Eigenschaften”.
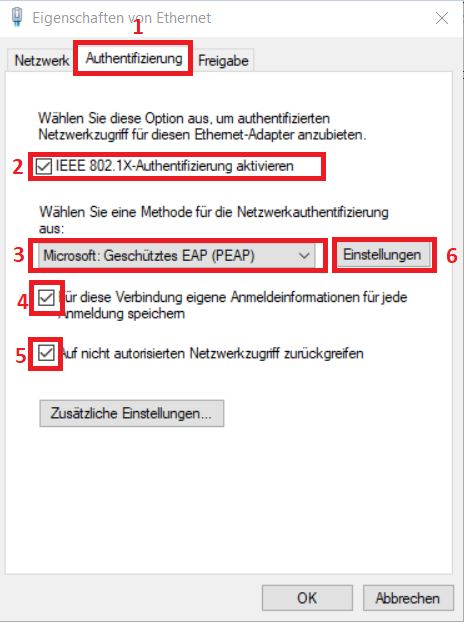
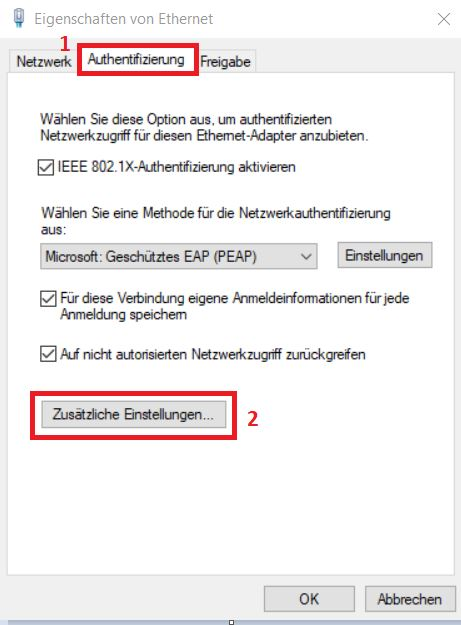
- Now go to the „Authentifizierung“ tab. Note that this can only be displayed if the above mentioned service has been started. Now change the settings according to the screenshot.
- Click on the “Eigenschaften”button (marker 6).
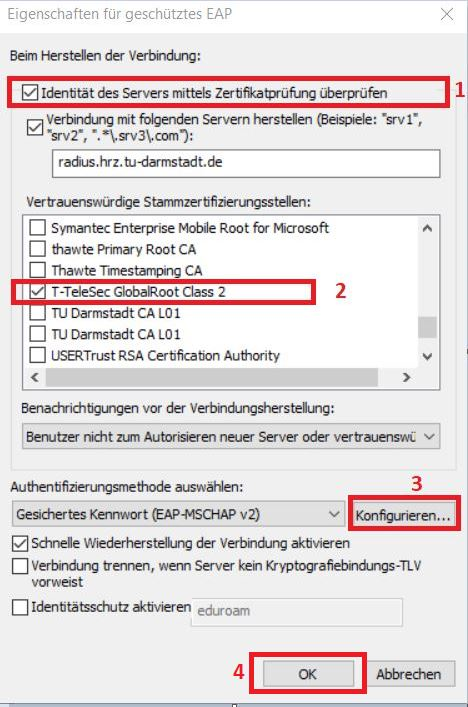
- Check the boxes at 1 and 2 as shown in the screenshot.
- Select „Gesichertes Kennwort (EAP-MSCHAP v2)“ as authentication method.
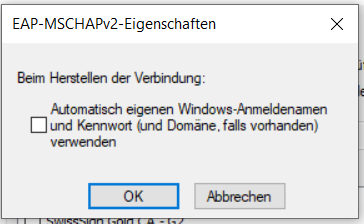
- Click on „Konfigurieren…“.
- The check mark must not be set.
- Click on “OK”.
- Click “OK” in the previous window.
- Select the „Authentifizierung“ tab.
- Click on „Zusätzliche Einstellungen“.
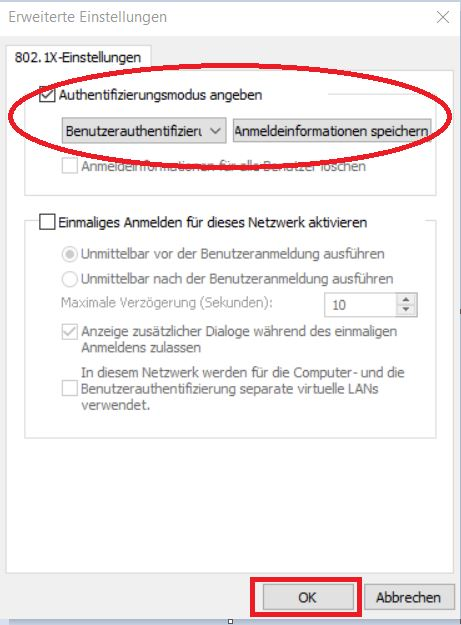
- Place a check mark next to „Authentifizierungsmodus angeben“.
- Select „Benutzerauthentifizierung“ from the drop-down menu.
- Click on “OK”.
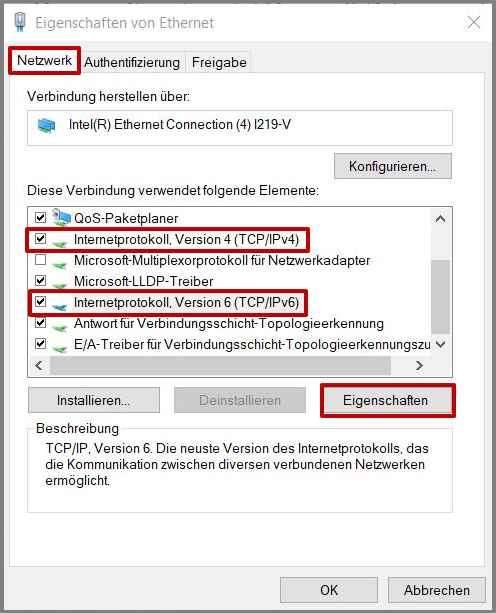
- Select the „Netzwerk“ tab.
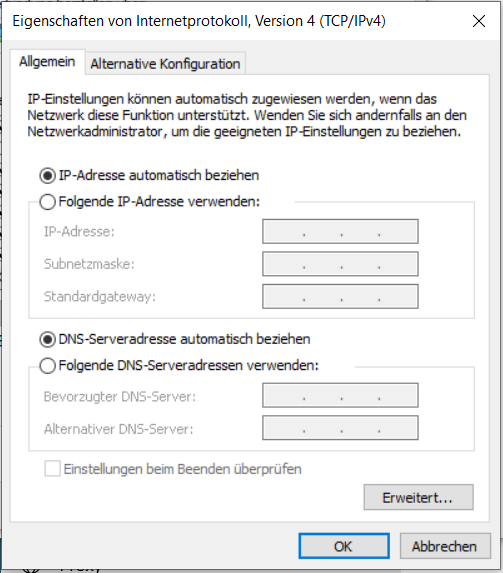
- Click on „Internetprotokoll, Version 4 (TCP/IPv4)“.
- Click on „Eigenschaften“.
- Select „IP-Adresse automatisch beziehen“.
- Select „DNS-Serveradresse automatisch beziehen“.
- Click OK.

- Now you can close the open windows and connect your PC to the network (via cable).
- A message will appear asking you to enter additional information (access data).
Please be aware that you must not enter your TU-ID and the corresponding password !
- Instead you should use the credentials of your WLAN-Account
user-name: <Loginname of WLAN-Account> (e.g. mj30xoxolan00@tu-darmstadt.de)
password: <password of this WLAN-account>
- As network location (selection form appears after login) you can select „Öffentlichen Ort“.
Instruction how to create and manage WLAN-accounts (opens in new tab)