Opening the Cisco Jabber App
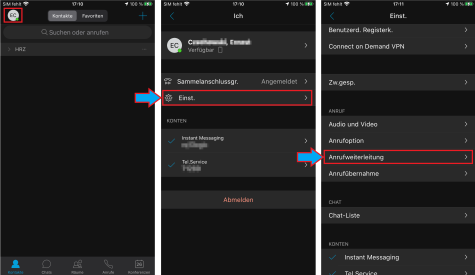
- Open the Cisco Jabber app on your smartphone. You should be able to see your contact list directly. To get into the settings, click on the circle with your initials or photo in the top left corner.
- To enter the settings, click on the item “Settings”. Then scroll down to “Call forwarding” and select the option. Now the menu for setting the call forwarding will open.
Set up call forwarding
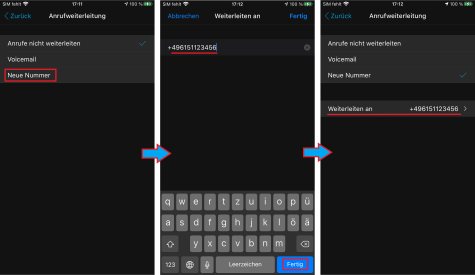
After you have selected the menu item “Call forwarding”, a new menu opens. Here you have the possibility to enter a phone number under “New number” to which calls should be forwarded.
Always use +49 for the area code. If the area code is e.g. 0172, then enter +49172.
Forwarding to a number without a currently registered device is not possible within the Jabber Client.
In this case, please use the UC-Portal to create the call forward.
Call forwarding is now set up.
More Instructions and support
More help and tips on using Jabber can be found here:
If you have any questions or problems, please contact the HRZ Service.


